Poland Strikes! 861
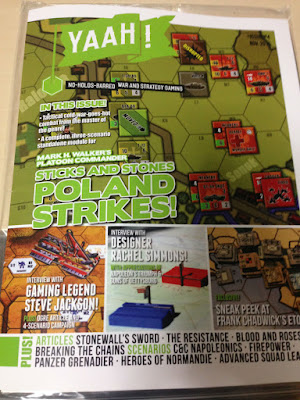
Poland Strikes! is a wargame included with Yaah! magazine issue no. 4 published in November 2015. Although it uses the same rules as Mark H. Walker's Platoon Commander - Sticks and Stones series, Poland Strikes! is a standalone game with three scenarios.
 The backstory here is that the Soviets and Americans finally got it over with and went to war in 1987.World War 3 began and ended with a nuclear exchange that wiped out billions and left civilization in tatters. After the dust cleared, both nations simply renewed their fight - this time with conventional forces. No one could have guessed that World War 4 would begin on The Day After.
At this point, you might be saying to yourself, "Hold on, this sounds awfully familiar." Given the scale, theme, and designer's name, you might be forgiven for confusing Sticks & Stones with World at War at first glance. Although there are some surface similarities between the systems, Sticks & Stones seems to represent an evolution of Mark's original platoon-combat design from many years ago.
Here are a few key differences between the systems just off the top of my head:
Most notably, SaS puts cards into the mix, providing another layer of strategy to the game. In SaS, a player who can play the right cards at the right time can make up for tactical disadvantages on the battlefield.
World at War: Eisenbach Gap got me into wargaming and I still pull it out and play it occasionally even these days. So I was curious to see what Mark's new design was like.
The Situation:
While the Americans and Soviets are dancing with each other in central Germany, the Poles decide to settle some old scores with Hungary and invade along the axis of Highway 861. This first scenario is aptly named "861". The Polish objective is to capture four town hexes for a tactical victory and six town hexes for a decisive victory. The Hungarians win if they can deny either of these to the Poles. The scenario lasts six turns.
OOB and Setup:
The Poles get 5 x OT-64, 3 x BMP-1, and 6 infantry. They enter the map on the lower right side hexes. The Hungarians set up 3 infantry, a T-55, and a couple of Saggers in the nearby town of Zelin. 2 infantry are loaded up and sit together with a couple of tanks in the hexes near the center of the board in Balocsa. The setup rules state that the latter can't move until certain conditions are met. I missed this in my first game but as you'll see, it didn't seem to affect the result much anyways.
Turn 1
The Poles get initiative this turn and give the first movement phase to the Hungarians, who sit nice and tight. The Poles advance their BMP-1s onto the map, hoping to evade opportunity fire. It does not go well as a Sagger missile snakes out from the north side of Zelin and eliminates one before it can do much of anything. A Hungarian T-55 in the same hex of the city (Q12) holds its fire, hoping to force the Poles to slow their advance. It works to great effect. Although the T-55 is a relic of a bygone era, its firepower is more than enough to lay waste to the Polish APCs. The OT-64s maneuver through the woods to the northwest of the city, clinging to the forested terrain for cover. At the end of the turn, the Hungarian player places his Focus marker on the infantry/tank in hex Q12.
Turn 2
Both sides draw new cards this turn. Neither has really used them much so far. The Hungarian infantry in Zelin holds its fire until the OT-64s get near but they miss their shot during the Polish move phase. With a couple of free Opportunity Fire cards handy, the Hungarians could have fired again but decide to hold on to their cards until the Polish infantry get near. The plan is to draw the Polish infantry into a knife-fight next turn and use the cards to keep them at bay.
The OT-64s creep a bit further towards the outskirts of the city and drop off their infantry. The Hungarians start moving their units down from the center of the map to reinforce the bridges to the south of Zelin.


At this point, you might be saying to yourself, "Hold on, this sounds awfully familiar." Given the scale, theme, and designer's name, you might be forgiven for confusing Sticks & Stones with World at War at first glance. Although there are some surface similarities between the systems, Sticks & Stones seems to represent an evolution of Mark's original platoon-combat design from many years ago.
Here are a few key differences between the systems just off the top of my head:
- Whereas WaW used chit pulls to determine who goes next and when the turn ends, the order of play in SaS is decided by initiative rolled for with a single die for each side at the beginning of each turn.
- SaS uses a Fire Results Table to work out combat results whereas WaW did not.
- Movement, fire combat, and close assault all happened in the same phase in World at War but these are given their own phases in SaS.
- Command was dealt with by HQ units in WaW, but it is reflected with Focus and Aid markers in SaS. These represent where a commander is focusing his energies on at any given moment during a battle.
Most notably, SaS puts cards into the mix, providing another layer of strategy to the game. In SaS, a player who can play the right cards at the right time can make up for tactical disadvantages on the battlefield.
 |
| Cards add an interesting dimension to the gameplay in Sticks and Stones |
World at War: Eisenbach Gap got me into wargaming and I still pull it out and play it occasionally even these days. So I was curious to see what Mark's new design was like.
The Situation:
While the Americans and Soviets are dancing with each other in central Germany, the Poles decide to settle some old scores with Hungary and invade along the axis of Highway 861. This first scenario is aptly named "861". The Polish objective is to capture four town hexes for a tactical victory and six town hexes for a decisive victory. The Hungarians win if they can deny either of these to the Poles. The scenario lasts six turns.
OOB and Setup:
The Poles get 5 x OT-64, 3 x BMP-1, and 6 infantry. They enter the map on the lower right side hexes. The Hungarians set up 3 infantry, a T-55, and a couple of Saggers in the nearby town of Zelin. 2 infantry are loaded up and sit together with a couple of tanks in the hexes near the center of the board in Balocsa. The setup rules state that the latter can't move until certain conditions are met. I missed this in my first game but as you'll see, it didn't seem to affect the result much anyways.
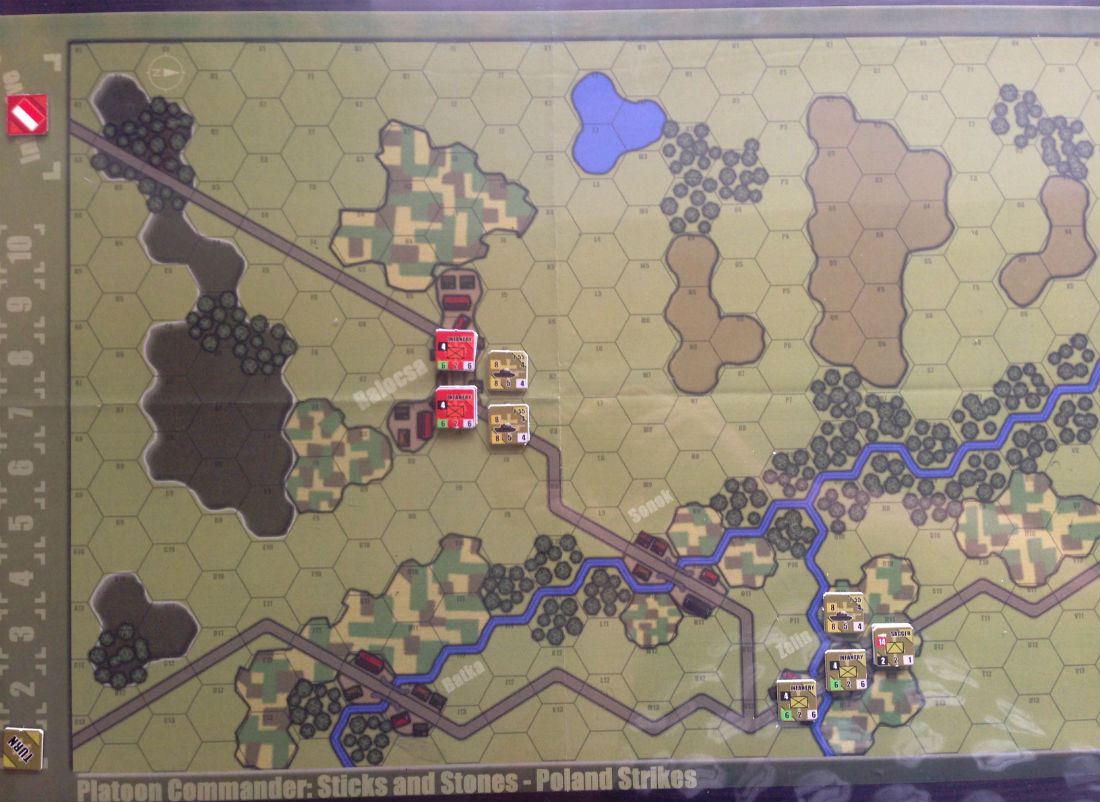 |
| Setup for Hungarians - Poles will enter map to the north (right side of map) |
The Poles get initiative this turn and give the first movement phase to the Hungarians, who sit nice and tight. The Poles advance their BMP-1s onto the map, hoping to evade opportunity fire. It does not go well as a Sagger missile snakes out from the north side of Zelin and eliminates one before it can do much of anything. A Hungarian T-55 in the same hex of the city (Q12) holds its fire, hoping to force the Poles to slow their advance. It works to great effect. Although the T-55 is a relic of a bygone era, its firepower is more than enough to lay waste to the Polish APCs. The OT-64s maneuver through the woods to the northwest of the city, clinging to the forested terrain for cover. At the end of the turn, the Hungarian player places his Focus marker on the infantry/tank in hex Q12.
 |
| The lay of the land at the end of turn 1 |
Turn 2
Both sides draw new cards this turn. Neither has really used them much so far. The Hungarian infantry in Zelin holds its fire until the OT-64s get near but they miss their shot during the Polish move phase. With a couple of free Opportunity Fire cards handy, the Hungarians could have fired again but decide to hold on to their cards until the Polish infantry get near. The plan is to draw the Polish infantry into a knife-fight next turn and use the cards to keep them at bay.
The OT-64s creep a bit further towards the outskirts of the city and drop off their infantry. The Hungarians start moving their units down from the center of the map to reinforce the bridges to the south of Zelin.
 |
| Polish infantry dismounts and prepares for an assault on Zelin. |
Turn 3
Well, despite having the initiative, things definitely do not go as planned for the Poles. The first part of the fire phase was spent firing a Sagger off from a group of Polish infantry way to the northwest of Zelin. The Hungarian T-55 and BTR-60 in Sonak took a hit each and it looked like the attempted reinforcement of Zelin was going to be put on hold for now.
The Hungarians allowed the Poles to move adjacent to the city and let loose with everything they got, playing multiple Opportunity Fire cards to keep the fun going all night long. After taking a reduction and a disruption effect for the encroaching Polish infantry, the assault got called off and the OT-64s were forced to move adjacent to Q12 in order to try and suppress the Hungarian infantry next turn. The Hungarians responded by doubling down on their hold of Q12 and sent another infantry platoon from the south of the city into the Q12 hex.
 |
| The Meat Grinder - Hungarians rain on the Poles' planned infantry assault |
Turn 4
Despite having clearly lost the initiative in this battle, I felt the Poles were still within winning distance at this point. The bulk of the hopes for the Hungarian seemed to be pinned on holding Q12. After taking the city, the Poles would have pried the door open and zoom across the map.
Alas it was not to be. Turn 4 turned out to be an even bigger fiasco than the previous turn.
At the end of last turn, the Hungarians kept their Focus marker on Q12 while the Poles put theirs back in the initiative box, hoping to plaster the infantry in the city before it could disrupt any further attempts on the planned assault. The Poles placed their Aid marker on the infantry in R11, hoping to rally the unit and get it moving into the city.
Well, the Poles did indeed rally their men and the OT-64s went to work, managing a successful disruption of the one of the Hungarian infantry in Q12. The other infantry unit disrupted the Polish infantry after an Add Firepower card was played. Polish infantry reserves would need to be brought adjacent to the city in hex R12.
Turn 5
The Poles kept knocking on the door but the Hungarians in Q12 refused to take the hint. As Polish infantry reorganized for yet another attempt at a close assault on the city, we ended up with nothing more than disruptions for both sides. The OT-64s failed miserably in doing anything to the Hungarian infantry. A series of 1's on the die roll for morale kept the Hungarians alive and kicking. The Aid and Focus markers are both firmly planted in the hex at this point. Very stubborn defense.

Turn 6
Well, the Hungarian infantry is still sitting there in Q12. Unbelievable. Now down to only one infantry unit, it has successfully held off every attack imaginable from all quarters. The Poles finally eliminate the unit in the Fire Phase of the turn and Polish infantry pours into the hex. At the end of the turn, in a futile gesture, the Poles close assault into the southern hex of Zelin and take the city. Unfortunately, time has run out and they are two city hexes away from a tactical victory.

Conclusion:
The result of my game may not sound exciting but it actually felt quite tense throughout. One thing I left out in my description was the card play going on throughout the game. I had copious notes on all of it and then lost my little notebook. In any case, a lot of what was keeping the Hungarians alive was simply a smarter use of cards throughout each turn. While the Poles usually spent cards quickly, the Hungarians held on to them and played several at once for maximum effect. This helped considerably in blunting the Polish assault. This was also my very first game, so I was paying more attention to the rules than to actual tactics at this point.
I though Poland Strikes! was pretty fun. Looking up results on the fire combat table took some getting used to at first but it became second-nature by the end of the game. You will be using this table a lot during a scenario so you will get quite used to it. I liked how range is handled - each unit has a color coded range (short, normal, and long) that you consult on a chart and this tells you if there are any column shifts to the combat table. Terrain also adjusts which column table you're using.
Again, this takes a bit of time to figure out at the beginning of the game but I had the column shifts pretty much memorized by the end of it. I though the way it handled defending armor values was very smooth too. You simply take the firepower of your attack and subtract the enemy's defending armor value and then use that to see which column you're going to roll under on the FRT. Morale is actually the deciding factor for the combat effects against a defending unit. The defender must roll a number of die equal to the number rolled up on the FRT and compare it to his morale. I think this is a very nice way of making the results of a battle about "who wants it more" and has the better training rather than who has the shiniest hardware.
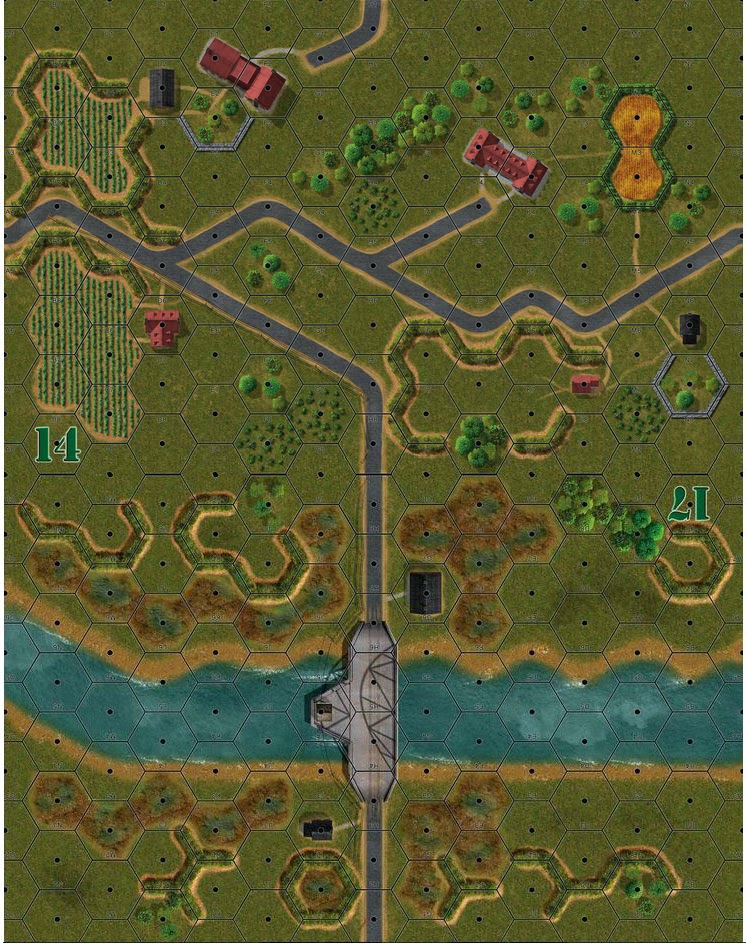
Update: I just played this scenario again after getting the rules straight and I had a very close play of this scenario. The Poles went through the first city like a hot knife through butter. The Hungarian player had to discard four cards to get his units moving in turn 3 to protect two cities. The Poles easily took a city to the south after a Sagger destroyed some transporting infantry, bringing the Poles to a tactical victory. Meanwhile, the remaining Polish army slammed into Sonok, defended by Hungarian infantry and a T-55. On the very last phase of the game, the Polish infantry tried a close assault into the western hex of the city and took it at 1-1 odds, giving them a major decisive victory.
 |
| End of Scenario 2 - Major Victory for Poland |
Great review. This looks like a fun game though it seems to be less bloody and wild than its older cousin World at War. The map looks also a bit crude with a very basic choice of color.
ReplyDeleteHi Walter. Thanks very much! You are absolutely right. It can be hard to knock out high morale enemies even if you score lots of hits. On the other hand, the Hungarians (with a morale of only 1) can usually be taken out pretty easily. Wily card play and good tactical choices can make up for it though.
DeleteI just played through the second scenario today and I think I enjoy this game a little bit more each time I play. The map is a bit crude but it is functional and easy enough to distinguish terrain types. For what amounts to a free game, I'm pretty happy with the quality of components though I will be running the map and cards through a laminator after I finish taking photos.
Hi Brad. Thanks for your reply. Being a fan of the World At War series, I will probably give the stick and stones series a try. I'm looking forward to reading more After Action Report (should you wish to publish more). By the way, you have a great blog - keep the passion alive!
DeleteThanks very much Walter! Drop by any time and leave a comment.
DeleteThis reminds me a lot of Twilight 2000
ReplyDeleteYeah, it has a similar theme to it, doesn't it? Maybe advance the timeline a couple of years and have only two or three tanks on the entire battlefield and a bunch of ragtag forces (marauders, mixed NATO units, deserters, survivors, etc.) and you would be pretty close to it.
Delete