There's a great little scenario in LnL's
A Day of Heroes which is based on the June 5. 1993 ambush of Pakistani peacekeepers by the Somalis in Mogadishu. In Mark Bowden's book, "Black Hawk Down", he uses the event to highlight the extreme danger faced by foreign military forces in the country at the time. The ambush also foreshadowed the October 3rd events involving the US military and exemplified how unpredictable this environment had become for anyone operating in Mogadishu. At this point in time, Aidid had declared war on the UN forces in Somalia and the ambush of the Pakistanis was one of the first signs that he was dead serious.
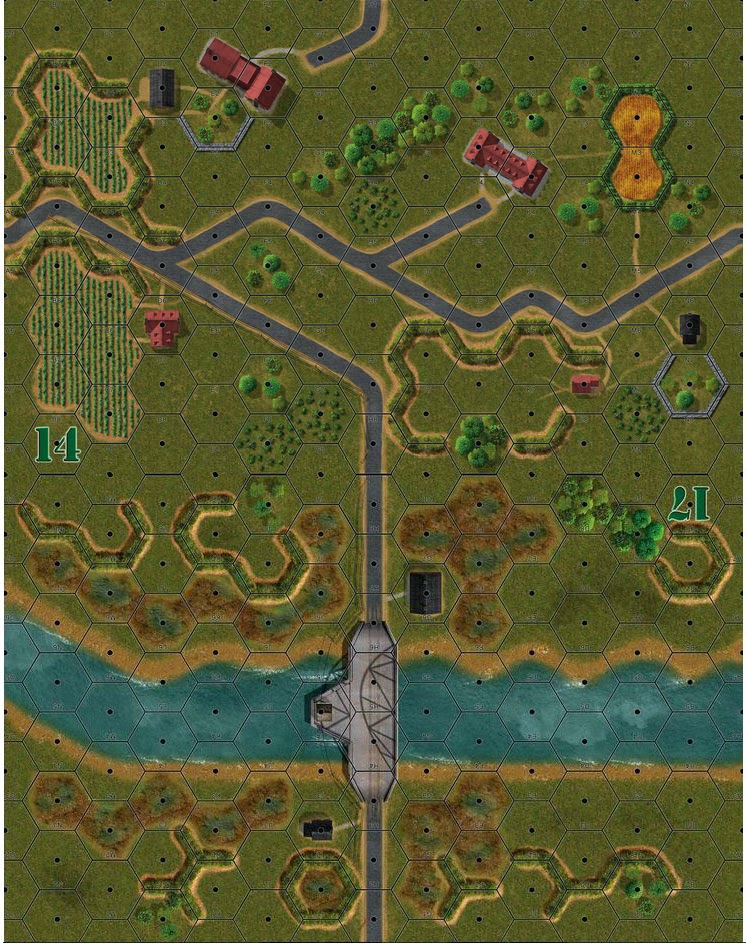
The scenario is only three turns long and involves a limited number of forces. The Pakistani goal is simply to move four counters off the board and the Somalis have to stop them. The Pakistanis set up completely surrounded and their every avenue of escape is cut off. They are pretty hooped from the beginning and only luck, speed, and smart movement will help them escape this ambush.
 |
| Pakistani UN forces are surrounded by Aidid's men and caught in an ambush. |
The Pakistanis get a bit of support in the shape of an MG3 machine gun and their officer, Lt. Abbas is quite capable as a 6-1-6 leader. My instinct is to combine the Pakistani forces into a single stack so I can double time them off the board but I also suspect that doing so would make them more vulnerable. I decide that it's every man for himself and let the MG3 squad provide cover while the rest of the Pakistani units race off the board in as many directions as possible to keep the Somalis guessing.
Turn 1: The Pakistanis send out one squad directly to the east in a brave attempt to soak up Somali opportunity fire. Lt. Abbas and his men move south towards the map edge while another squad follows behind. The MG3 gunners wait behind to provide cover fire.
 |
| A lone Pakistani squad moves to the east with the Somalis in hot pursuit. |
The Somalis start moving units closer in to get better firing positions. One Somali group, led by Ali, moves directly adjacent to Lt. Abbas and his men while the rest of the Somalis surround the building where the Pakistanis are firing their MG3. The lone squad sent to the east to distract the Somalis takes fire but it is not shaken. It has been a good round for the Pakistanis so far!
 |
| Lt. Abbas and his men make it far to the south but Ali and his men are close. |
|
Turn 2: The Somalis win initiative and Ali and his men open fire on Lt. Abbas and his men in the adjacent building. The building is pockmarked with hundreds of 7.62 mm rounds but the wild firing hits no one. Abbas and his men charge into the building to the south and out of the ambush area. They have made it.
 |
| Lt. Abbas and his men charge through the fire and make it out. |
The MG3 squad wastes no time in opening up on one of the Somali leaders in the adjacent building. All hell breaks loose and Will Waat is wounded while scores of his men are killed. Hopefully this helps to provide a breather for the other Pakistani squads and they can make a clean getaway.
Due to a scenario rule, the Somalis can actually rally shaken half squads in the operations phase so one of the shaken Somali squads manages a rally result and exchanges the favor with the MG3 squad, shaking it. There goes the Pakistani fire support!
 |
| The Pakistani MG3 squad is shaken after one of Will Waat's squads rallies and returns fire. |
The lone squad of Pakistanis who rushed to the east last turn have been shaken. As they start to make their way out of the ambush area, they take fire from every quarter. The shots are wild and inaccurate but they do enough damage to stop the Pakistani squad in its tracks as it gets pinned behind cars and shacks along the street.
The last good order squad of Pakistanis also makes a run for the southeast after seeing how the Somalis are distracted by firing at their comrades to the north.
 |
| While the Pakistanis to the north are shaken, the remaining Pakistani squad makes a run for it. |
Turn 3: Due to a special rule, one shaken Pakistani squad gets a chance to rally but flubs it. With only one remaining good order squad, the Pakistanis have no chance of getting four counters off the board to fulfill victory conditions but they bravely make an attempt to get one more off the board anyway. Unfortunately, Ali and his men are determined to make up for letting Abbas and his men get away. They are now adjacent to the Pakistanis on the street and open up at close range, shaking the squad. Ali's redemption is complete and the Somalis have stopped the Pakistanis from leaving the ambush area. The Somalis win as the Pakistanis have only moved 2 counters off the board.
 |
| Ali and his men stop the last remaining good order Pakistani unit from escaping the ambush. |
Conclusion: This one is really tough for the Pakistanis. If you play it safe and move through the buildings, you might not have enough time to make it off the map edge before getting surrounded by the Somalis. On the other hand, running through the streets in the open is an incredibly bad idea too. Don't let the size and length of the scenario fool you - this one really forces you to think things through before committing to a plan of action.
I really enjoyed the small size and short length of the scenario. It's very quick to set up and the special scenario rules are pretty cool and easy to get a handle on. I played it three times in about an hour and it was great fun. The Somalis won twice and the Pakistanis won once. It's a terrific learning scenario on par with "Chalk 2's Run" where you can get used to how the units move through different terrain, how combat works, and the special capabilities (and restrictions) of the Somali units.


Comments
Post a Comment